Showing posts with label Spring. Show all posts

Tuesday, April 26, 2016

Clara’s Strawberry Sprout

In Tot School last week Clara planted some strawberry seeds. We placed the container on the windowsill and have been waiting for the seeds to sprout. We were all so excited when we checked on it and found this little green sprout!!

We can’t wait to watch it grow. In the meantime we will be working on lots of fun plant art and science projects and reading books all about gardens, seeds and planting.

We have already really enjoyed these great books about plants and gardens:

The Small Seed, by Judith Nicholls ~ We are loving that this is a touch and feel book. It starts out with a small seed being planted and grows, roots a shoot and then a stem. Finallly, there is a beautiful sunflower. All done in a fun rhyiming text. Clara loves finding the touch and feel part on each page and I think the tactile interaction helps her retain the information better too.

The Surprise Garden, by Zoe Hall ~ This is a fun book that shares the journey of 3 children planting a garden that surprises them with all the wonderful food that grows from the plants. I really liked how it talks about the different parts of the plants that we eat. All of the girls have really enjoyed this book which is always nice. We also really enjoyed the collage like illustrations in this book.

Up in the Garden and Down in the Dirt, by Kate Messner ~ I really love this book because it shows young readers what is going on not only Up in the Garden where the plants are sprouting and growing, but down in the dirt in the hidden world where the roots are growing and insects creating creating tunnels and burrows. This is the story of a garden over the course of a year. We really enjoyed looking at the illustrations and finding all the fun details on each page. At the end of our book was a quick refrence page that gave a few facts about the different animals that were introduced in the garden and explained that some are helpful and others are not. Again I liked that this books was fun for all the girls to read together.

What are some of your favorite planting themed books?

For more planting fun and activities be sure to check out some of the plant and garden projects we have done already!!!

Follow our ADVENTURES on Facebook, Pinterest and Twitter!

Wednesday, April 2, 2014

Crafting Kites with Kids

The start of spring and the windy weather we have been having always makes me think of Kites.  We don’t usually have much luck when we try to fly our own kites, but we have had fun crafting some very pretty ones.  When Emily was little we make a Triangle Shape Kite, but this time we tried something a little different.  

To make our kites we used Bleeding Tissue Paper, cardstock, straws, yarn and some colored construction paper.  The girls always love working with bleeding tissue paper, it has a somewhat magical property to it which is always fun.  If you have never tired it before we definitely recommend it.

First, I cut out cardstock in the shape of a Kite and then Juliette got to work with the bleeding tissue paper.

IMG_6900

She covered the paper with a little bit of water then placed the pieces of bleeding tissue paper over the water.  They like to brush over them with a little more water to make sure they are sticking down to the paper well.

Once the paper is covered to satisfaction we just set them to the side and let them dry.

IMG_2910

Now for the fun part, Juliette pulled off all of the bleeder paper to see the beautiful colored design that was left behind…MAGIC!!!A Mommy's Adventures: Kite Craft

To put the kites together we cut pieces of colored straws to glue horizontally and vertically across the kite.  Then we glued on a long piece of yarn and construction paper bows for the tail.  Juliette was very excited to help me glue it together with the glue gun.  Since we have had a hard time gluing straws to paper in the past I figured this would be the best way.

  For another windy day project check out the Windsock Craft we made to go with the book The Wind Blew.

Follow our ADVENTURES on Facebook, Pinterest and Twitter!

Thursday, March 20, 2014

Salad Spinner Art ~ 3D Spring Flowers

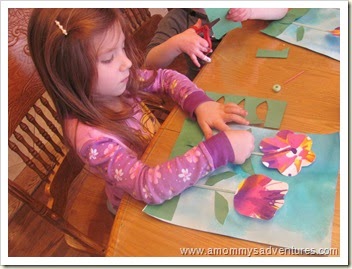
After the cold and snowy winter we have had here we are all so excited for the First Day of SPRING today.  To celebrate we had fun making this colorful 3 Dimensional Spring Flowers Project to brighten up the house.  The girls and I always love doing Salad Spinner projects.  It is so much fun to see the globs of paint spread out all over the paper.  When I was trying to think up a fun and different way to make flowers the salad spinner was the first thing that came to mind.  I absolutely LOVE how this project came out and the girls had so much fun working on it today!

Salad Spinner Art 3D Spring Flowers

For this project we used Water Color Paper, Blue Liquid Watercolors (these are my favorite paints!), Green Striped Plastic Drinking Straws, Cardstock and Washable Kids Paint.  You can use a Spin Art Set if you have one but we chose to use our Salad Spinner today.  I got mine at Ikea for $2.99 and it is amazing!

Salad Spinner Art 3D Spring Flowers First, I put a piece of watercolor paper on a backing tray, sprayed it with water to moisten it and then had the girls paint the whole piece with their blue liquid watercolors.

Salad Spinner Art 3D Spring Flowers Next, they took turns (since we only have one salad spinner) dropping slightly watered down paint onto a piece of paper at the bottom of the salad spinner.

IMG_6877 Once they were happy with how much paint they dropped onto the paper we put the top on and the girls spun away!

IMG_6880 I loved watching them help each other with this part.  They took turns holding the salad spinner down while the other spun it.

Salad Spinner Art 3D Spring Flowers Juliette checking to make sure it us just the way she wants it.

Salad Spinner Art 3D Spring Flowers After they made their spin art, I used a hair dryer to quickly dry the paint (the most amazing tip thanks to Jackie @ Happy Hooligans).  Then I traced around these flower cookie cutters we have and cut them out.

Salad Spinner Art 3D Spring Flowers

I had the girls trim the bottom off of one of the straw then I glued the flower onto the top part of a bendy straw, this way it could be moved all around and kind of sticks up from the paper to give it a more 3 dimensional effect.  Then we glued the whole straw onto the blue water colored paper.  (I did the gluing for this part since we were using a hot glue gun)

The girls cut fringe on a strip of green construction paper to add some grass and leaves to their flowers.

Salad Spinner Art 3D Spring Flowers We had so much fun working on this project, doesn't it get you so excited for SPRING!!

For another cute flower craft be sure to check out our Cupcake Liner Flowers.

This week I'm  linking up to:

 The Kids Co-Op, Show-and-Share Saturday, Link & Learn,  Share it Saturday, Mom's Library, The Sunday ShowcaseTuesday Tots, Preschool Corner &5K, We Made That.


Follow our ADVENTURES on Facebook, Pinterest and Twitter!

Friday, May 13, 2011

stART ~ Wake Me in Spring

Welcome to stART! I hope that you will enjoy our story and art project and maybe even share your own too. All I ask is that you link back to A Mommy’s Adventures somewhere in your post by either adding my button or a text link, so that others can see all the other great projects that everyone shares too! The linky will be open all week.  Be sure to stop by and visit the different links…every week there are so many different and fun book and craft ideas!

Check out the  stART tab in my navigation bar where you can find our past stART projects.  All the books that we have read and did a stART project for are listed in alphabetical order.

image

This week we have been enjoying all of the wonderful things that Spring has to offer, like flowers, trees blooming and some nice weather.  Emily also enjoyed reading Wake Me In Spring! , by James Preller.  In this book a bear is so tired and just wants to sleep (hibernate) all winter, but his friend mouse wants him to stay up and play.  He tries to convince him to stay up by telling him all the great things that you can do in the winter.  Bear says that he will not miss any of those winter things, but will miss his friend.  He tells him to wake him up in Spring when the flowers bloom.  After reading this cute story, we talked about all the fun things that we did in the winter (built snowmen, had hot chocolate) and then we talked about all the fun things we do in the Spring.  Emily loves the flowers so we made special flower pictures to go along with this book.
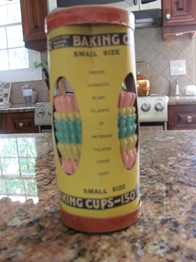
IMG_7989When I was over my grandmother’s house I noticed this really old pack of mini baking cups and she said that I could take them.  I knew they would be perfect for a project and we put them to use right away…to make Spring Flowers!
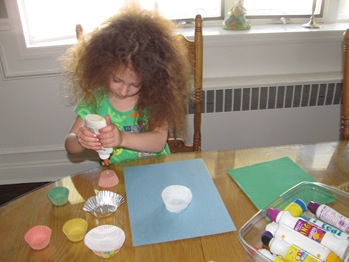
IMG_7986I gave Emily all of the supplies and we each worked on our own flowers.  After watching what I did she made her own.  It was so much fun to create together.  I love seeing how she tries to make more realistic pictures all on her own.    IMG_7987

She used a large baking cup and a small baking cup to make the flower.

IMG_7990Then she added construction paper for the grass, sun and leaves.  A popsicle stick for the stem. Do-A Dot markers and bug stickers helped to bring the picture to life!! IMG_7991 Emily’s Spring Flower

1px">Get your own Linky Tools here...

Thursday, April 14, 2011

stART ~ Pooh’s Easter Basket


Welcome to stART! I hope that you will enjoy our story and art project and maybe even share your own too. All I ask is that you link back to A Mommy’s Adventures somewhere in your post by either adding my button or a text link, so that others can see all the other great projects that everyone shares too! The linky will be open all week.  Be sure to stop by and visit the different links…every week there are so many different and fun book and craft ideas!

Check out the  stART tab in my navigation bar where you can find our past stART projects.  All the books that we have read and did a stART project for are listed in alphabetical order.

image

This week we read Pooh's Easter Basket.  This is a simple board book that Emily and now Juliette really enjoy.  The different characters from Winnie the Pooh all find different colored Easter Eggs. 

After reading this book we made some cute Handprint Bunny and Easter Egg Pictures.  For this project I made a sample and then gave Emily all the pieces she would need and let her put it together however she wanted.

First I helped Emily trace her hand on a piece of white paper and then cut it out.  To make the rabbits face we folded down the thumb, middle finger and pinky finger.  Then Emily glued the handprint and an oval white piece onto the paper with some green grass.  She enjoyed cutting the fringe to make the grass.

IMG_7774

Emily added the face, cotton ball tail, a construction paper sun (which she put together on her own) and then some foam Easter egg stickers.

IMG_7799  Emily’s finished Easter Bunny and Eggs

Thursday, April 7, 2011

stART ~ The Easter Chick


Welcome to stART! I hope that you will enjoy our story and art project and maybe even share your own too. All I ask is that you link back to A Mommy’s Adventures somewhere in your post by either adding my button or a text link, so that others can see all the other great projects that everyone shares too! The linky will be open all week.  Be sure to stop by and visit the different links…every week there are so many different and fun book and craft ideas!

Check out the  stART tab in my navigation bar where you can find our past stART projects.  All the books that we have read and did a stART project for are listed in alphabetical order.

image This week we read The Easter Chick , by Geraldine Elschner.  This is a cute story about a little chick that wants to be born on Easter Sunday.  All the animals in the barnyard are not really sure when that is since it always falls on a different date each year.  The old owl however, helps the mother hen and her chick to know when Easter Sunday is.  The story is well written and the illustrations are beautiful.

We made some really cute Easter Chicks hatching from their eggs to go along with this book!

IMG_7754Emily and Juliette decorated a yellow oval piece of construction paper with yellow markers, feathers and tissue paper.  Then they added a white half shell and yellow wings.  Then they glued on two wiggly eyes and a orange beak.  Although I had everything prepared in advance they were able to put their chicks together however they liked. IMG_7755 IMG_7756

I love seeing how each one comes out looking different even though they had all of the same supplies to work with :0) IMG_7767

Emily’s chick

(the black is where the shell is cracking some more)

IMG_7768

Juliette’s Chick


You are next...
Click here to enter

Thursday, May 13, 2010

stART ~ Splish, Splash, Spring

Welcome to stART! I hope that you will enjoy our story and art project and maybe even share your own too. All I ask is that you link back to A Mommy’s Adventures so that everyone can see all the other great projects that everyone shares too! The linky will be open all week.

I added a stART tab in my navigation bar to make it easier to search for past stART projects. Be sure to check it out!! All the books that we have read and did a stART project for are listed in alphabetical order.

image

It has been a very rainy week so we have been reading Splish, Splash, Sprint by Jan Carr. This is a great rhyming story about three kids that explore all the fun things that happen on a spring day in the rain.

I planned on having Emily draw a picture to put out in the rain so that she could how the rain would blend all of the colors however once Emily started drawing she did such a great job of drawing herself in the rain with a rain hat and umbrella I didn’t want the picture to get ruined. Thank goodness Emily agreed and we just kept the picture. We will probably try another rain picture on another rainy day :0)

IMG_3442

Emily working on her rainy day picture. It is so much fun to see her drawing people and adding lot’s of details to her pictures.

IMG_3453

Emily’s finished picture.

It is a picture of her with a rain hat and an umbrella.

Thursday, April 15, 2010

stART ~ Fletcher and the Springtime Blossoms

Welcome to  stART! I hope that you will enjoy our story and art project and maybe even share your own too.  All I ask is that you link back to A Mommy’s Adventures so that everyone can see all the other great projects that everyone shares too! The linky will be open all week.

I added a stART tab in my navigation bar to make it easier to search for past stART projects.  Be sure to check it out!!  All the books that we have read and did a stART project for are listed in alphabetical order.

 Fletcher and the Springtime blossoms

This week we have been enjoying Fletcher and the Springtime Blossoms, by Julia Rawlinson.  This is fun story about a fox that is having fun enjoying all the sights and sounds of springtime, until he discovers some unexpected snow.  He decides that he must warn all the animals to get ready for the snow.  Finally, Fletcher gets a wonderful springtime surprise, the snow is actually beautiful  blossoms falling from the trees.  This book is beautifully written and illustrated and we are both so glad that we found this book during our recent trip to the library.

After reading this book together, I pointed out the tree in front of our house that has beautiful pink blossoms.  Emily keeps asking me when they are going to fall down like in Fletcher and the Springtime Blossoms.  I can’t wait till she gets to see it snowing pink blossoms in front of our house!  She has also been noticing all of the beautiful trees as we are driving.  She actually points to them and yells “Mommy look and the beautiful blossoms!”  so for our project I knew that Emily would love making her own springtime tree full of beautiful blossoms!

Emily’s Springtime Blossoms 

IMG_3052

First I painted her hand and arm with brown paint to make the trunk and branches of her tree.  She loves having her hands painted and giggled the whole time.

IMG_3053

While we waited for the tree trunk and branches to dry Emily painted half of a piece of paper with blue water color (I made this by putting water and food coloring into a muffin tin and it worked so well and was so inexpensive too!)

IMG_3054

Then she painted the other half green, her favorite color :0)

While we waited for these to dry we went outside to enjoy the beautiful weather!

IMG_3057

When we came back in I cut out Emily’s hand and arm print tree and she glued it onto the green and blue paper.

IMG_3058

Emily glued pieces of pink and white tissue paper to the branches of her tree.  Notice our blossoms through the window in the background of the picture, Emily kept checking it outside while she was working on her project!

Handprint Blossom Tree

Emily’s Handprint Springtime Blossoms


Thursday, March 25, 2010

stART ~ Good Egg


Welcome to stART! I hope that you will enjoy our story and art project and maybe even share your own too! The linky will be open all week.

I added a stART tab in my navigation bar to make it easier to search for past stART projects.  Be sure to check it out!!  All the books that we have read and did a stART project for are listed in alphabetical order.

Good Egg

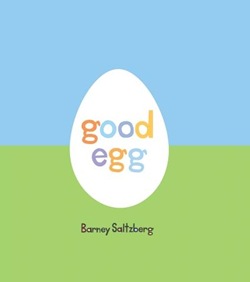
This week we read Good Egg, by Barney Saltzberg.  If you click on the link you can see a great video of this book in action…yes I did say ACTION!!  This is a really simple but amazingly cute lift flap, pull tab book.  Emily received this book from her Aunt as a Big Sister present when Juliette was born.  She loved helping egg follow all the directions in the book.

I wanted to do a fun Egg Art Project that did not involve coloring hard boiled eggs since we will be doing plenty of that very soon :)  I got the idea for this adorable painted egg from Kids Craft Weekly and knew right away that this would be perfect, especially since I have been wanting to paint on tin foil with Emily for a while now!

 Tin Foil Painted Eggs

I cut out an egg shape from a cardboard box and wrapped tin foil around it.  Then I filled up the perfect for paint palettes that I recently bought from Oriental trading with yellow, pink, purple and green (Emily insisted on the green paint) paint. 

IMG_2675

Emily painted the egg with a paint brush.

IMG_2677

Finally while the paint was still wet she used a q-tip to make a design in the paint.  This revealed the shiny tin foil that was underneath.

IMG_2697

Emily had so much fun working on these she made 2 more!  

LinkWithin

Related Posts with Thumbnails