Showing posts with label Recipes. Show all posts

Monday, March 10, 2014

Cooking with Kids ~ Apple Cinnamon Roll Ups

The girls and I love to cook and they are always helping me in the kitchen.  When children help in the kitchen they are learning so many important things and practicing so many different skills in a fun way, with a yummy reward at the end.  They get so excited to see what they were actually able to create and this recipe is fun because they get to do it mostly on their own. 

Apple Cinnamon Roll UpsAll you need to make these is a tube of crescent rolls, a slice of apple for each triangle and some cinnamon sugar.

Place the apple slice on a crescent roll dough triangle, sprinkle with some cinnamon sugar, roll up and bake at 350 degrees for about 10 minutes.

They are so yummy and fun to make too!!!

While making these the girls had to follow directions and use fine motor skills.

Wednesday, October 19, 2011

Watcha Making Wednesday ~ Funfetti Pancakes

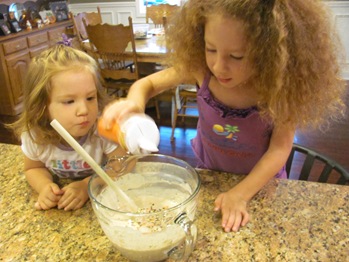
Emily and Juliette LOVE to help me cook.  They are always helping me bake and love mixing and pouring and scooping the ingredients, but this week they were super excited to actually help cook the pancakes on the stove with me!

First of course they helped mix all of the ingredients together:

IMG_0481IMG_0482IMG_0486IMG_0487IMG_0488IMG_0491IMG_0492

I love the look of concentration on their faces as they are working.

Then to make them extra special we added… IMG_0494IMG_0495…Fall Sprinkles to the batter!!!

Time to get cooking

IMG_0496I added the batter to a squeeze bottle so they could squirt the batter right onto the griddle.  Juliette did this too, but safety was my first concern so I was not able to take a picture, just imagine the huge grin on her face as she is actually at the stove helping make the pancakes!!

 IMG_0497 I made the E and J for them, pancake batter in a squirt bottle is a lot of fun!

IMG_0499 Emily getting to flip her pancakes.IMG_0500

Juliette listened so well, I trusted her to flip them while I took a picture.  She did a great job!! IMG_0502

The girls with their Initial Pancakes.

IMG_0503

I happened to have some whipped cream in the fridge so we added that to the pancakes too!

Our Pancake Recipe

Ingredients
  • 1  cup all-purpose flour
  • 1/2 cup whole wheat flour
  • 3 1/2 teaspoons baking powder
  • 1 teaspoon salt
  • 1 tablespoon white sugar
  • 1 1/4 cups milk
  • 1 egg
  • 3 tablespoons canola oil

Directions

  1. In a large bowl, mix together the flour, baking powder, salt and sugar. Make a well in the center and pour in the milk, egg and oil; mix until smooth.
  2. Heat a lightly oiled griddle or frying pan over medium high heat. Pour, scoop or squeeze the batter onto the griddle, using approximately 1/4 cup for each pancake. Brown on both sides and serve hot.

To make them extra fun add in a few shakes of colored sprinkles it will look just like Funfetti cake mix!!


For more great recipes check out Watcha Making Wednesdays on The Ramblings and Adventures of a S.A.H.M

Monday, October 3, 2011

Muffin Tin Monday and the Mini Apple Pies

This week for Muffin Tin Monday, the girls were very excited to have some Mini Apple Pies in their Muffin Tin Lunch.  We made them in our muffin tin from the apples we picked when we went apple picking.  
Emily and Juliette's Muffin Tin Monday Lunch
IMG_0341  Homemade Mini Apple Pie, Vanilla Yogurt with Carvel Crunchies (if you get a carvel cake ask for extra crunchies, they are great in yogurt), Pretzels and Turkey and Cheese Kabobs
Both Emily and Juliette had fun helping me make the Mini Apple Pies.  We made our own crust so first the girls took turn adding the flour and sugar.
IMG_0314 IMG_0315They both thought the pastry blender was a lot of fun and used it to cut the butter into the flour and salt.  IMG_0316IMG_0317Once the dough was rolled out I cut it into circles and the girls pushed them into our muffin tin.
IMG_0320IMG_0322
Emily and Juliette each scooped some of the apple mixture into the crust.  The girls enjoyed taste testing the apples as I cut them to make the filling.
IMG_0325
Our Mini Apple Pies out of the oven and ready for a taste test!
IMG_0328 IMG_0327Can you tell that Juliette was excited to dig in!!
Our Recipe for Apple Pie
Double Pie Crust
  • 2/3 cup plus 2 tablespoons butter
  • 2 cups all purpose flour
  • 1 teaspoon salt
  • 4 to 5 tablespoons cold water
Cut butter into flour and salt until the size of small peas.  Sprinkle in water, 1 tablespoon at a time, tossing with a fork until the flour is moistened and pastry cleans side of bowl.
Gather Pastry into a ball, divide in half to make top and bottom crust.   Flatten and roll out on lightly floured surface.  Place in pie pan.
Filling
  • 1/2 cup sugar
  • 1/4 cup all-purpose flour
  • 1/2 teaspoon ground cinnamon (I probably use a lot more, I just shake it in until I like the color)
  • Dash of salt
  • 6 cups thinly sliced pared apples
  • 2 tablespoons butter
Heat oven to 425 degrees.  Mix sugar, flour , cinnamon and salt.  Stir in apples.  Fill lined pie pan, then dot with butter.
I usually do a lattice top to for my pie with other half of the pastry.   Then cover the edge with a aluminum foil and bake for 40 to 50 minutes, removing the aluminum foil during the last 15 minutes.  The crust should be browned and the filling with begin to bubble.
For more great recipes check out Watcha Making Wednesdays on The Ramblings and Adventures of a S.A.H.M

Monday, August 22, 2011

Summer Fun List ~ Make Homemade Lemonade

IMG_8512I have never actually made homemade lemonade myself, but have always wanted to so I thought this would be the perfect thing to add to our Summer Fun List.  Lemonade always makes me think about beautiful warm summer days playing outside and having a good time.

First we gathered all the supplies we would need:

6 lemons,  1/2 a cup of sugar and 1 cup of water

I also got out my little juicer and pink glass pitcher.

First, I made a simple syrup with 1/2 a cup of sugar and 1 cup of water.  This was a simple step and all I did was just melt the sugar into the water in a saucepan on the stove then let cool.

Then it was time for the girls to get to work!!

IMG_8497IMG_8502

Emily and Juliette took turns juicing the lemons.  I cut them in half and they used their muscles to push it around on the little glass juicer.  They thought it was neat that the pits stayed in the top and the juice flowed to the bottom.

 IMG_8503IMG_8505 In between of course they had to taste some lemons…they were nice and sour!!

IMG_8506 IMG_8507 Finally, we added the juice of the lemons, the simple syrup that I had made earlier, some ice and enough water to fill the pitcher, probably about 4 cups and the girls took turns stirring it.

IMG_8509IMG_8511

Time for a taste….the girls loved it!!

Tuesday, December 7, 2010

Kids in the Kitchen ~ Oreo Balls

IMG_6503

These easy to prepare decadent treats are like nothing you have ever tasted before and are sure to be the hit of any holiday party!

Emily helped me make these for a Christmas Party this past weekend.

All you need is:

A bag of Oreo Sandwich Cookies, a package of cream cheese, semi-sweet chocolate chips and some shortening.
IMG_6431

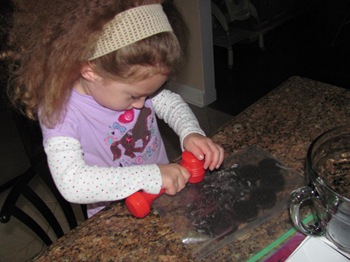
First, crush the Oreo Cookies.  This is the perfect job for your child, I brought out our play hammers and let Emily bang away.  My pampered chef chopper also did a great job and really quickly too!

IMG_6432

In a large bowl blend the crushed Oreo Cookies and softened cream cheese until well combined.

Form into balls and chill for about an hour.  Finally cover in melted chocolate and wait for it to harden.
IMG_6433

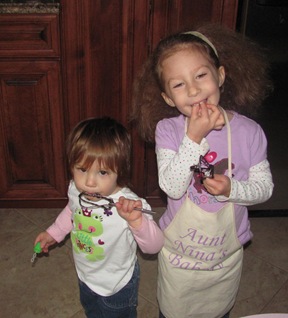
Since this is a no bake, no egg recipe your helpers can help you clean the beaters…and believe me they will enjoy that!!


Oreo Balls

  • 8 ounces softened cream cheese or whipped cream cheese
  • 18 ounces package of Oreo cookies, crushed (crush the entire cookie- don't remove the filling!)
  • 2 cups semi-sweet or milk chocolate chips
  • 1 tablespoon shortening

Mix cream cheese with electric mixer until fluffy. Add the crushed Oreos and beat on high until well mixed.  Then roll Oreo cookie mix into one inch Oreo Balls.  Chill for about 1 hour or until firm.

Next, melt the chocolate chips and shortening with a double boiler or in the microwave.

Dip the Oreo balls completely into the melted chocolate.  I use two spoons to roll them around the scoop them out.  Put on wax paper (do not skip the wax paper!!  They will stick to the baking sheet…I know from experience). After the Oreo balls harden, keep them in the refrigerator.

For festive holiday treats melt colored white chocolate and drizzle over the tops.  I put it in a Ziploc baggie and snip a small hole in the corner.

Makes about 3 or 4 dozen Oreo Balls, depending on the size

Tuesday, November 30, 2010

Muffin Tin Monday

There was no theme this week for Muffin Tin Monday so we finished up some leftovers. IMG_6212

Emily enjoyed the Butternut Squash soup we made for Thanksgiving.

IMG_6210  Top Row: Grapes, Ranch dressing, Cucumbers

Bottom Row: Artichoke dip on crackers and Butternut Squash soup

Butternut Squash Soup

  • 1 medium butternut squash, peeled, seeded and chopped
  • 2 tart green apples, peeled, cored and chopped
  • 1 medium onion, chopped
  • 1/4 tsp dried rosemary
  • 1/4 tsp marjoram
  • 6 cups chicken broth
  • 2 slices stale bread
  • 1 tsp salt
  • 1/4 tsp pepper
  • 1/4 cup heavy cream

In a large pot over medium high heat, simmer all ingredients except the cream, covered for 45 minutes.  Puree in a blender or food processor, 2 cups at a time.  Return puree to pot.  Stir in cream and heat to just below boiling.

You can make ahead and freeze without adding cream.

Tuesday, November 23, 2010

Kids in the Kitchen ~ Caramel Popcorn

I LOVE Caramel popcorn and decided to try making it for the first time with Emily.  This is also the first time that Emily has had popcorn so she was really excited to help make it and enjoyed trying it.  She liked watching it pop, but said the plain popcorn was to dry.  Caramel coated popcorn on the other hand was delicious and she probably would have eaten it all if we let her!

I changed the recipe a little so here is how we made ours:

Caramel Popcorn

First, I preheated the oven to 250 degrees.  Then we made the popcorn.

IMG_6158First Emily put 1/2 a cup of popping corn into our hot air popcorn makerIMG_6159

I turned it on and Juliette and Daddy came in to watch!

IMG_6167   We all watched the bowl fill up with freshly popped popcorn.

IMG_6162

Next, Emily and I made the caramel.  First we melted 1/4 of a cup of butter (half a stick) in a medium saucepan over medium heat.  Then we stirred in 1 cup of brown sugar, 1/4 cup of corn syrup and 1/2 a teaspoon of salt.  We brought it to a boil, stirring constantly.

Boil without stirring 4 minutes.  Emily liked this part because it got all bubbly.  I always get nervous that I am going to burn it so I can’t wait for this part to be over!

Remove from heat and stir in 1/4 of a teaspoon of baking soda and 1/2 a teaspoon of vanilla extract.  Pour in a thin stream over popcorn, stirring to coat.

Finally, place in two large shallow baking dishes and bake in preheated oven, stirring every 15 minutes, for 45 minutes. Remove from oven and let cool completely before breaking into pieces.

Enjoy!!

We really enjoyed this popcorn, what is your favorite way to eat fresh popped popcorn?

Wednesday, November 3, 2010

Kids in the Kitchen ~ Roasted Pumpkin Seeds

This year after carving our pumpkin we saved the seeds to roast.  This was the first time that I have done this and I have to say I was actually tempted to buy another pumpkin just to roast the seeds again!!  Emily really enjoyed them so I think we will definitely be buying them in the store for a snack or to add to salads from now on.

Our Roasted Pumpkin Seeds

I googled recipes and then combined the basic ideas that I read to make ours.

First, I boiled the seeds in salted water for 10 minutes, this was supposed to make actual seed inside have a salty taste.  I couldn’t really tell if it made a difference, so next time I will have to try it both ways.  Then I set them on a cookie sheet to dry over night.

IMG_5795

Once they were dry Emily mixed together 1 Tbsp of melted butter and 1 Tbsp of Olive Oil with a pinch of salt.

 IMG_5797

Next, she added the pumpkin seeds and stirred to coat them in the butter.

IMG_5798

She dumped them onto a baking sheet

IMG_5799 and spread them out.

We put them in a 300 degree oven for about half an hour.  I just kept checking them to see if they seemed like they were done.  Not that I really knew what done looked like :0)

After they cooled a little bit we cracked them open and enjoyed them.  I did read that you could eat the whole seed shell and all, but when I tried it was too hard for me.

What is your favorite way to roast pumpkin seeds?

Wednesday, September 29, 2010

Wordless Wednesday ~ Apple Picking

Apple Picking 2010

We brought our little red wagon with us and went apple picking together.  Emily is an apple picking pro by now and Juliette could not wait to get out of the wagon and at those apples!  The funniest part of the whole trip was Juliette pulling an apple so hard that when it came off of the tree she landed right on her bottom.  She just looked at us and smiled, still holding her apple.

More Apple Picking 2010   We had a great time together picking apples with our little family!!

Here are some of the recipes we use all our apples for:

Apple Bread

Apple Fritters

Mini Carmel Apples

Apple Pumpkin Muffins

LinkWithin

Related Posts with Thumbnails